A slide show demonstrating the basic process of violin making.
It is chronological, however the are instances where steps overlap and some back-tracking is done to further refine an assembly. For instance, before hollowing, I tack glue the back and belly to the ribs while still in the mold to refine the outline. When that is done, they are removed and I continue on. Also, many sub-steps have been left out in the interest of brevity and the limited ability of still photography to capture the technique.
There are almost as many ways to make a violin as there are violin makers (different methods leave clues that appraisers use to identify a particular antique violin's maker). Additionally, makers often change their methods over time as they learn different techniques or improve older ones. Several of the pictures shown here are of methods I no longer use, although the methods shown are hardly original to me and are standard procedure for many violin makers.
For the most part, violin making has changed little over the past 300 years. The choice to use these methods today is not merely aesthetic. Three hundred years of artisans perfecting their craft have left us with skills and procedures that give successful results in the most efficient amount of time. They had families to feed and so do I! However, violins for the mass market have increasingly been made with the aid of machines for over 150 years (the exception being 100% handmade instruments from places where skilled labor is very, very cheap).
I often find that by the time I set up a power tool and the work-piece, I could have been nearly done with a method that uses solely hand tools on the bench. Of course, one must have developed the skill to use the tool and practice continually. One reason to use a knife when another tool requiring less skill might do is it keeps my skills honed for a later step when the knife may be the best tool to use. If I only used my gouges and knife every couple of months for scrolls, they would not look very good at all!
12.01.2010
2.09.2010
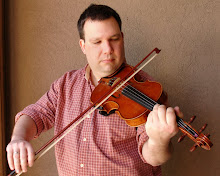
"The Wounded Hussar" on a Hopper Violin
The Anglo/Irish air "The Wounded Hussar" played on a violin made by Russell Hopper completed January, 2010. This is the same violin pictured in an earlier post on January 21. I've tweaked the response and tone to my satisfaction, mainly by slightly moving the soundpost inside the body. By changing the location of the post's point of contact (within about 2mm in any direction), the response and timbre of each string will change.
Simply said, the belly flexes around the point where the post makes contact with the wood. The hard, less flexible maple back of the violin provides a solid platform for the post to sit on. There are long-standing false theories on how the sound-post works, the most prevelant one being that the post transfers the vibrations to the back. I'll write more about the sound-post later in detail.
1.30.2010
Ben's Beautiful Violin Bridges

Along with the soundpost, the bridge maybe the most important component to getting the best sound from a violin. It takes a great skill, intuition and patience to bring all the elements together to make the most of a violin's sound. I wonder how many violins are dismissed by a player simply because it was poorly set up and adjusted. Here is a slide show on Flickr of Ben's beautiful bridge work.
The next time you are examining a violin, look at the bridge. Is it crisply carved? Do the feet fit the belly perfectly? These are signs that the bridge cutter made the effort to ensure you are getting the best sound even before you begin to play. The bridge blank should preferably be an Aubert "De Luxe" or "Super Luxe" bridge. Examine the wood figure on the bridge. The back side (facing the player and bearing mfr. stamp) should have a straight, uninterrupted flame. The front side should have a field of evenly sized small flecks. This is an ideal and some slight deviation is acceptable. Most importantly, when examined from the side, the medullary rays, which appear as very thin lines in the the wood must be perfectly vertical and parallel with the back edge of the bridge.
A Perfect Bridge Blank
Note that bridge manufacturers do not grade their bridges by the consistancy of figure, but mostly by wood age and treatment. It is up to the violin maker to select desirable bridges from a supplier's batch. I select bridges the same way I select tonewood (after all, the bridge is the smallest piece of tonewood). I go to a supplier and sort through the bridges, selecting the ones that meet my standard. I hang them in the sun for a year to season before I use them.
Below are a few of my bridge cutting tools.


Diagram on bridge cutting from my notebooks. The red hatched areas show areas to cut from the blank and the numbers are desired thicknesses marked in milimeters.
1.25.2010
LOGO and STAMP
Violin makers have long had maker's marks integrated into their labels, the two most famous being Antonio Stradivari's initials flanking a cross and Giuseppe Guarneri's "IHS" initials which earned him the moniker "del Gesu."


Many labels incorporate a symbol of the area the maker comes from. Most makers before the mid-twentieth century lived in the same place their entire lives. Today, we can expect to live in many places over our lifetimes. I now live in Birmingham, but I was raised on Sullivan's Island, South Carolina, a barrier island forming the north mouth of Charleston Harbor on the east coast of the US. Birmingham bears little relation to who I am, so my label is designed to reflect my origins.

My maker's mark is a palmetto tree flanked by my initials. The palmetto tree is native to Sullivan's Island and is attributed as instrumental to Colonel Moultrie's defense of Sullivan's Island against an attempt by British warships to enter Charleston Harbor and lay siege to Charleston in June, 1776. During the artillery duel, cannonballs fired at the fort from the British ships simply sank into the soft, tough palmetto wood. The fleet was repulsed and the British did not return to capture Charleston until 1780, using a land-based siege.
 |
| South Carolina Militia Civil War Button- 1863 |
1.23.2010
Violin Making at the University of New Hampshire
New Hampshire Chronicle features UNH's Violin Craftmansship Institute where I received my training under Horst Kloss who appears at 5:33 (along with yours truly touching up the varnish on an old violin).
1.21.2010
First Violin of 2010

Completing this instrument is bittersweet, due to the death of my friend and violin making mentor, Curt Johnson, to cancer in September of 2009. Curt worked at the highly reputed Amati Violin Shop in Houston, TX. He had long wished to study violin making in Cremona and he made a visit there to interview with Maestro Bissolotti. However, he was not able to attend, so violin making was suspended for teaching mathematics, classical guitar, and rock climbing. I met him in 2004, during the remission of his first fight with cancer and just as I was beginning to make violins as a respite from my architecture career. His advice then was invaluable and gave me a good sense of what was required of me to do good work.
One day Curt came to my house with armfuls of wood, tools and books. He told me that since he would never use them, I could have them. What an amazing gift! In the batch of wood was some beautiful old Bosnian maple he had bought in 1991 during a trip to Germany. He sold most of his wood to Howard Core and kept a few exceptional billets for himself. I set the wood aside for a future special occasion, much like a collector of fine wine.
In 2008, Curt's cancer had returned to his abdomen and he began a new regimen of chemotherapy. I was working on my third violin at the time, and I would visit him often to talk about music and violins. One day in March of 2009, he called me. "Russell, I'm f**ked. I'm going into hospice and I have 4-6 months to live." At that time, I was half-way through my fiddle. I set it aside and pulled out the wood he gave me. I resolved to do my best to make sure he saw that wood become a violin before he was gone. I was able to finish the violin, unvarnished, a couple of weeks before he died. I visited him and played it for him at his bedside with his friends and family. It was the toughest concert I ever gave. Each time I pick up a tool he gave to me that day, I think of him.

The sound is excellent; sweet and complex in the upper registers and big and rich in the lower strings, almost viola-like. The timbre is even across the registers, i.e. the violin has the same voice quality on the g string as it does the e string. There are still a few adjustments to be made, the final step in the violin making process. I'd like to get a quicker attack on the notes when playing fast and softly. As it stands now, I feel a little too much bow pressure is needed to get the string ringing. This is fine for legato playing, but the articulation needed for Irish fiddle requires the string to be "plucked" by the bow on nearly every note. I will start by systematically adjusting the position of the the soundpost. The selection of strings that best suits the violin is considered, too. Strings are not "one size fits all." Often, the tone and response on an old violin can be improved just by using a different make or gauge of string.


Russell Hopper Violin Maker
Subscribe to:
Posts (Atom)